How to Import HEIC into Lightroom on Windows and Mac
If you want to edit and organize your HEIC photos in Lightroom, the following guide will teach you how you can import your HEIC photos into the Lightroom app. It provides you with detailed methods to open HEIC files in the Lightroom app on your computer.
Lightroom is a photo editing and photo organizer app by Adobe that allows you to retouch your photos and organize them the way you want. If you are going to add photos from your iOS-based devices such as iPhone or iPad to the app, you will need specific versions of the Lightroom app to be able to import your photos.

How to Import HEIC into Lightroom on Computer
The reason not all the versions of Lightroom work with your iOS photos is because these devices save the captured photos in HEIC format. The format is not widely supported and so Adobe has some particular versions of the Lightroom app in which these photos can be imported.
For Mac users, your Mac should be running on macOS High Sierra 10.13 or later, and the support for HEIC format is available in the June 2018 update of the Lightroom app. Supported app versions are Lightroom CC 1.4 and Lightroom Classic CC 7.4.
For Windows users, your computer should be running on Windows 10, and the support for HEIC format was added in the August 2018 update of Lightroom CC 1.5 and Lightroom Classic CC 7.5.
Part 1: How to Import HEIC into Lightroom on Windows 10
If you have obtained the supported version of Lightroom on your Windows 10 PC, this section has the steps on how you can open HEIC photos in the Lightroom app on your computer. It is pretty easy to do that as opening files has always been an easy task in all the apps out there.
Here is how you open HEIC with Lightroom on your Windows 10 PC:
Step 1. Double-click on the Lightroom app icon on your desktop to launch the app.
Step 2. When the app launches, click on the + (plus) sign and select Browse to add photos from your PC.
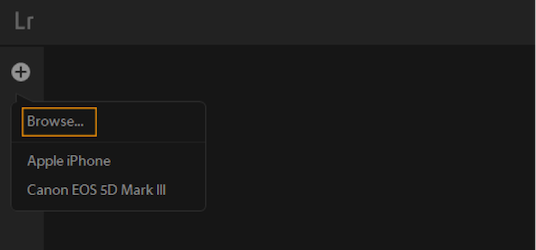
Browse for HEIC Photos with Lightroom on PC
Step 3. Select the photos you want to add to the app.
Your chosen HEIC photos should be available in the Lightroom app on your PC.
Part 2: How to Open HEIC Photo in Lightroom on Mac 10.13 & Later
While Mac users can always use the Preview app to open and view HEIC files, Preview does not let you edit your HEIC photos. Lightroom is what you can use to edit your HEIC photos and it is pretty simple to open your HEIC files in the Lightroom app on your Mac.
As long as you have the supported version of macOS and Lightroom, you can easily open and edit your HEIC photos with the app.
The following is how you launch your HEIC photos in the Lightroom app on your Mac:
Step 1. Click on Launchpad in your Dock and search for and click on Adobe Lightroom CC. It will open the Lightroom app on your Mac.
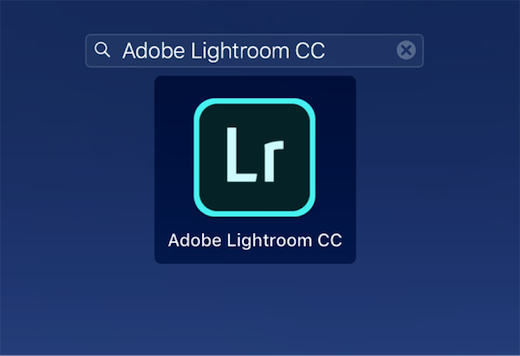
Launch the Lightroom App on Mac
Step 2. When the Lightroom app opens, click on the File menu at the top and select the option that says Add Photos. Alternatively, you may press the Command + Shift + I keys on your keyboard.
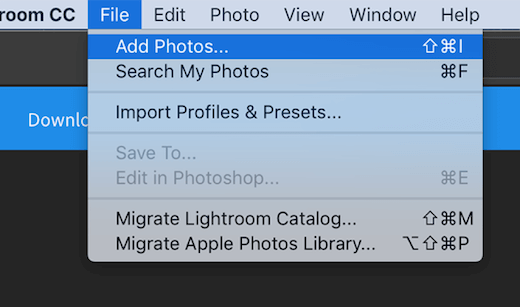
Import HEIC Photos into Lightroom on Mac
Step 3. On the following screen, choose the HEIC photos you would like to open in the Lightroom app. Then, click on the button that says Review for Import.
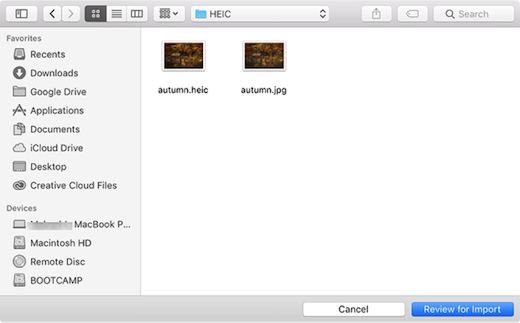
Select and Add HEIC Photos to Lightroom on Mac
The selected photos will launch in the Lightroom app on your machine. That is how you open your HEIC photos in Adobe’s Lightroom app on a Mac.
Part 3. How to Import HEIC into Lightroom on Unsupported Mac/Windows
If your computer is not one of the supported computers for HEIC compatibility, you will not be able to use the above methods to import HEIC files into the Lightroom app on your machine. However, all hope is not lost and there is still a way for you to import your photos in the Lightroom app.
To import HEIC photos into Lightroom on unsupported Windows and Mac computers, you will need to first convert your HEIC photos to the JPG format. There is a web-based Free HEIC to JPG converter called iMobie HEIC Converter that allows you to upload all your HEIC photos to convert them to the JPG format at a time.
It works on both Windows and Mac machines and the following is how you use it:
Step 1. Open a browser on your computer and head over to the iMobie HEIC Converter website.
Step 2. When the website loads, click on Click to Select to upload your HEIC photos for conversion. Checkmark Keep EXIF Data to preserve the EXIF data. Choose file format and image quality from the top-right menu.
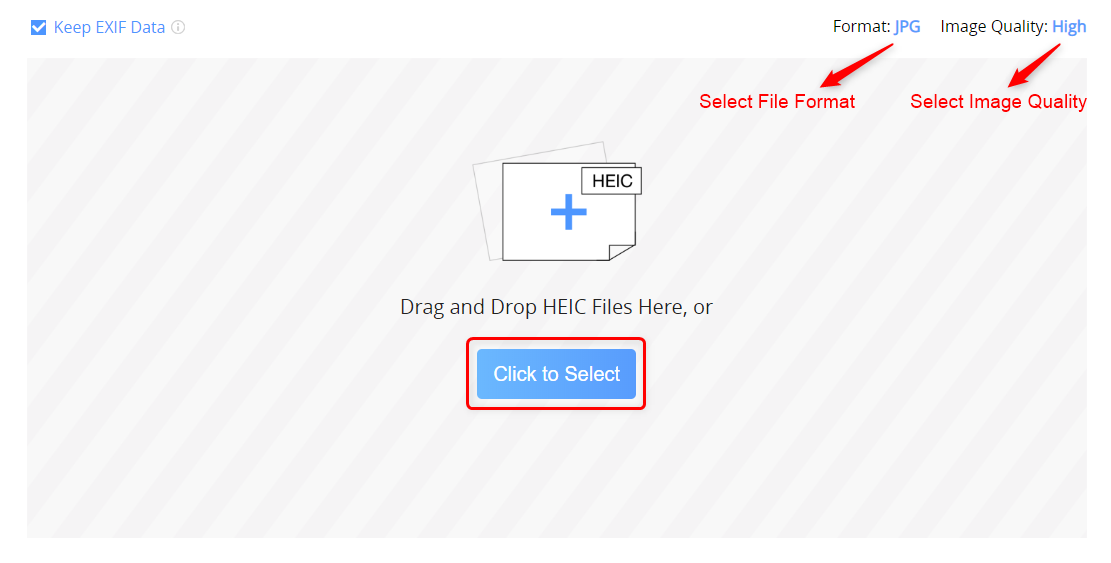
Click to Select Heic Photos you Want to Convert
Step 3. Download the converted JPG files on your computer and open them in Lightroom.
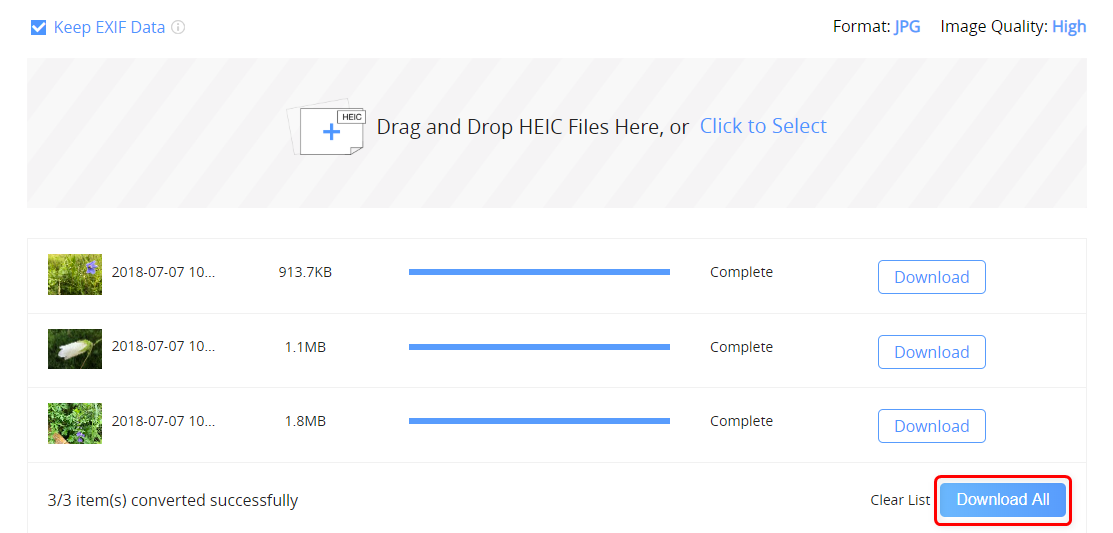
Download the Converted JPG Files
You will find the app opens your photos without a hitch.
Don’t Miss: How to Open HEIC Files in Photoshop >
The Bottom Line
If Lightroom happens to be your go-to app for photo editing, the above guide should teach you how to import your HEIC photos into the Lightroom app on your computer. You can then edit the photos as you like.
More Related Articles

Popular Articles & Tips You May Like


Work for iMobie team for 5 years as well as an Apple fan, love to help more users solve various types of iOS or Android related issues.

iMobie HEIC Converter
FREE & Simple Tool to Convert Any HEIC File to JPG in 3-Step:
- * 100% Free & Safe
Hot & Trending
 How to Convert HEIC to JPG on Google Drive Easily
 How to Download HEIC Photos as JPG in Google Photos
 How to Open and View HEIC File on Android
 What is HEIC File and How to Open It
 How to Change a HEIC File to JPEG on Mac/PC
 How to Change a HEIC File to JPG on iPhone
 The Best 5 Free HEIC Viewer for Windows and Mac
 Top & Free HEIC File Converter for Windows/Mac
 How to Open a HEIC File on Windows and Mac