What is HEIC File and How to Open It
If you are wondering what HEIC is and where and why it is used, our guide below should tell you everything you need to know about this new file format from the Cupertino based company. Read on to learn more.
- Home
- Heic News & Wikis
- Wikis
- What is HEIC File and How to Open It
If you have been paying attention to the recent announcements from Apple, you have likely heard this term called HEIC. The term has made users wondering as to what this new thing is and how it is going to change things on your Apple devices including iPhones and Macs. If you are like those users who are curious to know what a HEIC file is, the following guide should be of great use to you.
The guide explains what HEIC is, where it is used, why it is used, and how you can access it on your desktop machines including Windows PCs and Macs. Let’s check out the guide to learn more about this term coming from Apple.
What is a HEIC File: Detailed Explanation
HEIC is actually a file format used by Apple for storing images on your iPhones and Macs. Earlier, Apple used the widely popular JPEG format to let you capture and store photos on your machines. Starting in 2017, the company has made HEIC as the default file format for all the images that you capture on your Apple devices.
The reason Apple started to use this new file format for images is that it has a high-compression rate while retaining the original quality of the images. Basically, where a JPEG image takes 4 MB of your phone’s memory, a HEIC image will only take about half of that. That results in you saving a load of memory space on your devices.
HEIC is based on the HEIF (High-Efficiency Image Format) standard that allows users to have multiple compressed items in a container on your machines. That may sound a bit too developer thing but as a front-end user, all you need to know is HEIC is a compressed image format used on Apple devices.
That should answer you what a HEIC photo is. If you want to learn more info about HEIC, you can refer to this HEIC INFO site.
How to Open a HEIC File on Windows/Mac
Now that you know what HEIC is, where it is used, and why it is used, you may want to know how you can go about opening HEIC files on your Windows PCs or Macs.
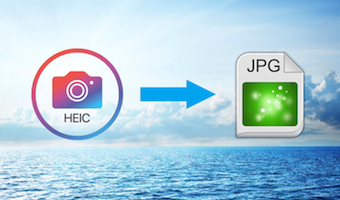
While you can view the HEIC photos without any external help on your iOS devices, the desktop platforms are yet to gain the support for it. In the meantime, though, you still have some ways to access photos of this file format on your machines. The best way to view HEIC photos, for now, is to first convert them to JPG and then view the JPGs as you would normally do.
In order to convert your HEIC photos to JPG, you are going to need a converter. Fortunately, there’s a great and FREE one by iMobie and it is called iMobie HEIC Converter. It is a web-based converter that helps you bulk convert your images from HEIC format to JPG so you can view your photos on almost all the devices in the world.
Some of the features you are going to love about the converter are:
- Custom quality – you can choose what quality your converted images should be in. It could be Standard, Medium, or High.
- Drag and drop – you can easily drag a HEIC photo or an entire HEIC folder onto the converter and it will do what it needs to do.
- EXIF data – the EXIF data contained in your images do not get lost while performing the conversion process.
- Multi-platform – the converter should work on both Windows and Mac machines.
If you have your photos lying around in the HEIC format on your iPhone and you wish to view them on your Windows PC or Mac anyhow, the following is how you use the iMobie HEIC Converter to convert your photos.
Step 1 Open a web browser on your computer and head over to the iMobie HEIC Converter website. When you are there, click on the “Click to Select” button to add your HEIC files to the converter.
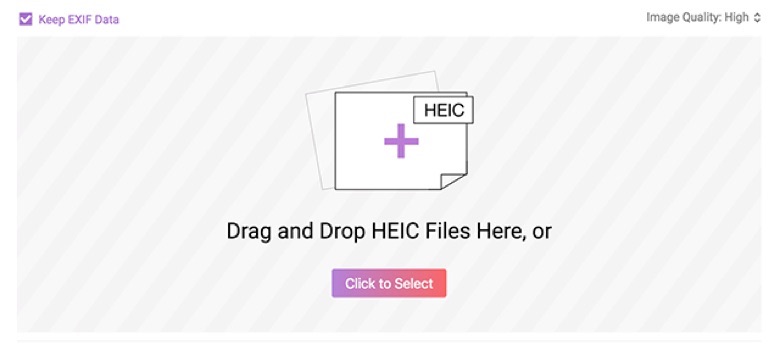
How to Open a HEIC File on Windows/Mac
Step 2 If you would like for your images’ EXIF data to be preserved, checkmark the box that says Keep EXIF Data. Use the Image Quality dropdown menu to choose quality for your output files.
Step 3 Once your HEIC images have all been converted to JPG, save the output JPG files to your computer.
That is how you use an online converter to convert HEIC images to JPG format.
The Bottom Line
We hope the above guide has been able to shed a light on what HEIC is, what a HEIC photo is, and how you can view these file formats on your different computers. iMobie HEIC Converter helps you convert your images from HEIC format to JPG so you can view your photos on almost all the devices in the world. Give it a try >
More Related Articles


iMobie HEIC Converter
FREE & Simple Tool to Convert Any HEIC File to JPG in 3-Step:
- * 100% Free & Safe
Hot & Trending
 How to Batch Convert HEIC to JPG on Mac & Windows
 How to Import HEIC into Lightroom on Windows and Mac
 How to Convert HEIC to JPG on Google Drive Easily
 How to Convert HEIC to GIF in 3 Free Ways
 How to Convert HEIC to JPG Online For Free
 How to Open a HEIC File on Windows and Mac
 How to Convert HEIC to JPG on PC/Mac

