How to Download HEIC Photos as JPG in Google Photos
If you have your HEIC photos stored with Google Photos and you wish to download them in the JPG format, the following guide should teach you how to download HEIC as JPG in Google Photos. Read on to learn how to do it.
Apple’s HEIC image file format support is gradually rolling out to various services and Google Photos is one of those services that now has native support for it. It is obvious why Google added support for the format because it wanted Apple users to be able to store their photos on the photo storage service.
While HEIC photos work just fine and you can easily view them in Google Photos, problems arise when you want to download your photos. Since your photos’ original format was .heic, they will be downloaded in that format instead of JPG. What that means is you will not be able to view the downloaded HEIC photos on your computer if your computer does not have support for it.
Fortunately, there’s an option in Google Photos for HEIC to JPG conversion and it is shown below for you.
How to Download HEIC Photo as JPG in Google Photos with Just Right Click
HEIC files in Google Photos can be viewed as any other images but you lose the viewing support for them when you download these photos offline to your computer. However, there’s a way to overcome the issue.
While not official, there is a method that lets you download your HEIC files in JPG format from Google Photos. It uses your browser’s image saving feature to let you do it and the following shows how you can do it for your own HEIC files.
Step 1. Open a browser on your computer and head over to the Google Photos website. Log-in to your account if you are not already.
Step 2. Click on the HEIC photo you want to download in the JPG format so it opens in full-preview mode.
Step 3. Then the image opens in the preview mode, right-click on the image and choose the option that says Save Image As. It will let you save the chosen image to your computer.
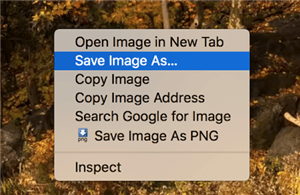
Save HEIC image as JPG from Google Photos
Step 4. Select a folder where you would like to save your HEIC image in the JPG format.
You are all set. Your chosen HEIC image will be downloaded in the JPG format on your computer. You can then open this image in any of the image viewers available on your machine as JPG is a widely supported format.
When you download and view the image on your computer, one thing is clearly noticeable. Your downloaded image is not of the same resolution as your original HEIC file. This is because your browser has only saved the preview copy of the image on your computer.
If you would like to download the image in its full resolution, simply preview your image on Google Photos and then press Ctrl + – (minus sign) on Windows and Command + – (minus sign) on Mac to zoom out. Zoom all the way out and then right-click on the image and choose Save Image As.
Your image will be downloaded in its original resolution on your computer.
How to Download HEIC Photo as JPG in Google Photos with HEIC Converter
If you are facing issues with the above method or if you are unable to get your HEIC photo in full resolution, you have another method available to accomplish the task.
In this method, what you are going to do is you are going to use a HEIC converter that will convert your HEIC files to the JPG format. Then, you can upload these files to your Google Photos account and view or download them in whatever resolution you want using the official download option on the Photos platform.
The free converter you are going to use is called iMobie HEIC Converter which converts your HEIC files to JPG, works on both Windows and Mac, can remove or keep EXIF data, and has several other features. The following is how you use it.
Step 1. Head over to the Google Photos website and select the HEIC photo you want to convert to JPG. When the photo opens in preview mode, click on three-dots and then select the option that says Download to download the photo to your computer.
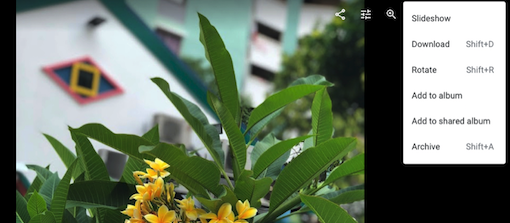
Download HEIC Photos from Google Photos
Step 2. Open a new tab in your browser and head over to the iMobie HEIC Converter website. Click on the button that says Click to Select and choose your HEIC file to upload it to the website.
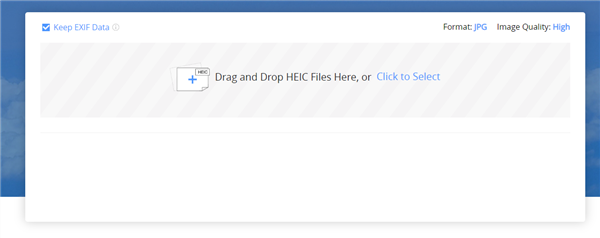
Convert HEIC to JPG Before Uploading to Google Photos
Step 3. Tick-mark the Keep EXIF Data option if you would like to preserve the image data. Also, choose an option from the Image Quality menu.
Step 4. Download the converted JPG photo to your computer.
Step 5. Get back to the Google Photos website and click on the option that says Upload. Upload the JPG version of your HEIC file.
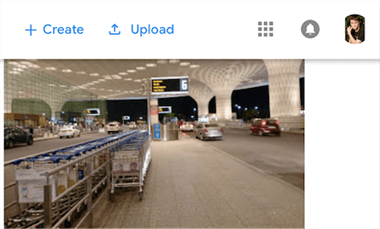
Upload the Converted JPG Photo to Google Photos
Your HEIC photo should now be available in the JPG format in your Google Photos account.
The Bottom Line
If you have uploaded photos from your iOS devices’ to your Google Photos account, your photos are likely in the HEIC format. The above guide shows how you can download those less-compatible HEIC photos in the widely-compatible JPG format from Google Photos to your computer.
More Related Articles

iMobie HEIC Converter
FREE & Simple Tool to Convert Any HEIC File to JPG in 3-Step:
- * 100% Free & Safe
Hot & Trending
 HEIC Photos Won’t Upload on My Windows – Here Are the Fixes
 How to Fix Can’t Import HEIC Photos to Mac with the Most Practical Method
 How to Download HEIC Photos as JPG in Google Photos
 How to Open HEIC Files in Photoshop
 How to Open and View HEIC File on Android
 The Best 5 Free HEIC Viewer for Windows and Mac
