How to Stop iPhone from Taking Photos in HEIC/HEIF
If your iPhone runs iOS 11 or later, your phone takes photos in the HEIC format. If you do not prefer this, you can disable HEIC on your iPhone. This guide explains what this new HEIC format is and how you can enable and disable it on your iOS device.
Apple often pushes out major versions of its iOS operating system and you get to download these updates on your iPhone and iPad devices. If you have updated to iOS 11 or later on your iPhone, you have noticed that the Camera app now saves your photos in the HEIC format and not JPG. If this is causing incompatibility on your devices such as you cannot view these photos on your other devices, you may want to revert the settings back to use the JPG format for your photos.
That is exactly what you are going to learn in the following guide. You will find out what exactly the HEIC format is, where it is used, why Apple added it to the iPhone, and how you can disable this format on your iPhone. You will also learn how you can turn your existing HEIC photos to the widely recognized JPG format in the below guide.
Part 1. Brief Introduction to HEIC/HEIF
HEIC stands for High-Efficiency Image File Format and it is a container to save your images in. This format relatively uses less of your memory space to store your photos. Therefore, the users who want to store more photos while keeping less of their memory occupied use this image format.
If you have used an iPhone for quite some time, you know that your device captures photos in really amazing quality. This quality is actually a burden on your memory space as it uses more of your iPhone’s storage. If you take a look at the size of the photos taken with an iPhone, you will notice they are significantly larger than other phones’ photos.
That is when Apple thought of changing the image file format on the iPhone so that your photos do not occupy much memory space. Apple then decided to use the HEIC format as the default image format on all of their iPhones. This format was announced with the iOS 11, and any iPhone user that updated to this version, getting the ability to save photos in this compressed image format.
If your iPhone runs iOS 11 or later, you should find that your image files are now much smaller in size compared to before but without any loss in the quality of the images.
Part 2. How to Turn On/Off High-Efficiency Image in iOS 11 and Later
If you went ahead and updated your iOS-based device like the iPhone to the latest iOS 11 or later, you have already got the ability to save your photos in the compressed HEIC format on your phone. By default, this option should be enabled on your iPhone meaning there really is not anything you need to do to start using this format for your camera captures.
However, there are certain times when you may want to use JPG and not HEIC for your photos. One of the major reasons is that your iPhone photos are not compatible with your other devices. HEIC is a relatively new image format for the consumer products and so there is not much compatibility for it on many devices. For instance, your Windows PC cannot open the HEIC format without an external app. While the apps and utilities are being pushed to make this format widely recognizable, it is still far away from reaching the stage where the more supported formats like JPG and PNG are.
One of the ways to make your iPhone’s photos compatible with non-HEIC supported devices is to convert your photos to the JPG format. Luckily, with the iPhone, you do not even need to use an external app to do that. There is a built-in option on your iPhone to save your future camera photos in the JPG format. You can enable it as follows.
Step 1. Launch the Settings app from the home screen on your iPhone.
Step 2. On the following screen, scroll down and find the option that says Camera. Tap on the option when you find it.
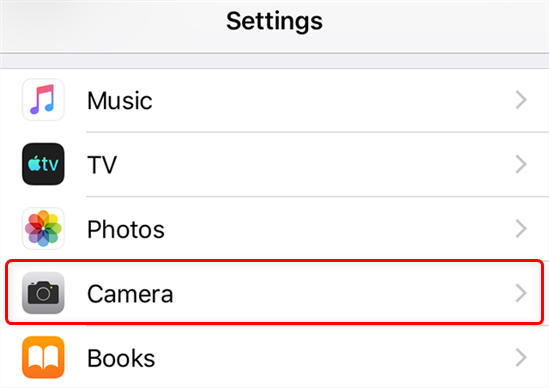
Access the iPhone Camera Settings
Step 3. The following screen lets you configure the camera settings on your iPhone. Since you are looking to change the format that your iPhone uses for your photos, tap on the option that says Formats.
Step 4. The screen that opens will let you select a file format for your iPhone’s photos. On this screen, tap on the option that says Most Compatible.
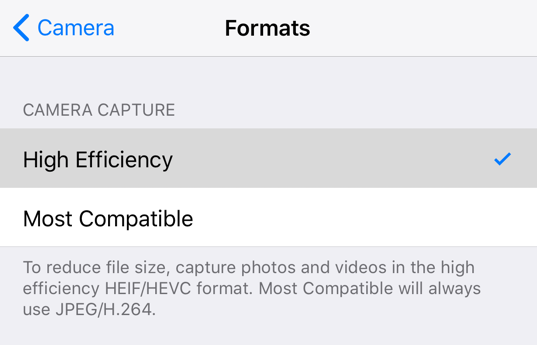
Choose Most Compatible as the Image File Format
Your iPhone will now save your photos in the most compatible format which is JPG. The HEIC image format will no longer be used for your photos on your iPhone until you turn on High Efficiency in the camera settings.
Part 3. How to Fix iPhone Take HEIC Photos not JPG with HEIC to JPG Converter
If you have already captured photos on your iPhone after updating your phone to iOS 11, all of your photos should be saved in the HEIC format. What this means is your other non-compatible devices will not be able to open these photos if you transfer these photos without first converting them.
One of the ways to deal with this issue is to convert your HEIC photos to a more recognized format like JPG. This way your photos will be viewable on almost all the devices out there. There are actually several tools in the market to help you perform the conversion and turn your HEIC photos to the JPG format.
The following shows how you can use an online tool and a desktop app to convert HEIC to JPG on your devices.
1. Use the Online HEIC to JPG Converter
If you only have a few HEIC photos that you want to convert to the JPG format, then it is highly recommended that you use an online converter tool. This way you will not have to install anything on your computer just for converting a few of your photos.
iMobie has an online Free HEIC to JPG converter tool that allows you to load your source HEIC files, convert them to the JPG format, and then download them to your computer. All it takes is for you to visit the site and click on a few buttons.
The following shows how you can do that.
Step 1. Open a new tab in your browser and head over to the HEIC to JPG converter website.
Step 2. Once you are on the website, click on the Convert Now button to open the converter tool.

Launch the HEIC to JPG Conversion Tool
Step 3. At the top right corner of the tool, click on the Format dropdown and select an output format for your photos. Then, click on the Image Quality menu and set the output quality for your photos.
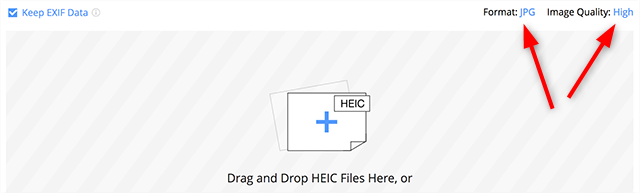
Configure Options for your Conversion Task
Step 4. You now need to add your HEIC files to the tool. To do this, either click on the Click to Select button or drag the HEIC files from your computer and drop them onto the tool. Your files will begin to upload.
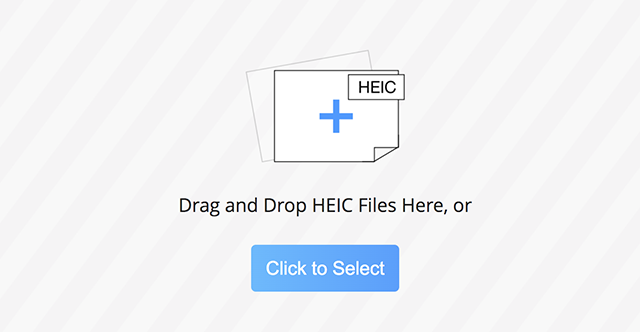
Upload your HEIC Photos to the Online Tool
Step 5. Your photos will be automatically converted to JPG when they are uploaded. Click on the Download All button to download all of your converted photos to your computer.
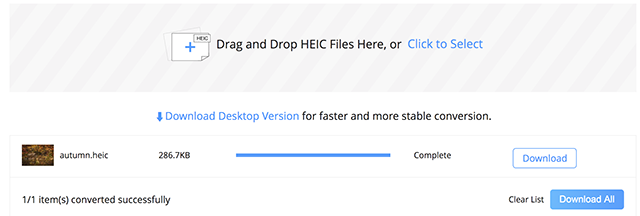
Download Converted Photos
You are all set.
2. Use the Desktop HEIC to JPG Converter
One of the drawbacks of using an online conversion tool is that you need to upload and download all of your photos. If you have many photos to convert to JPG, you will want to use something that works locally on your computer.
Fortunately, iMobie has a HEIC to JPG converter tool for desktop users as well. You can use this app on your computer to convert all your HEIC photos to JPG in a few easy clicks. Since this works locally, you do not need to upload or download your photos.
The following shows how you can use this tool.
Step 1. Download and install the iMobie HEIC to JPG Converter app on your Windows or Mac computer.
Step 2. Open the app and click on Select Files to add your HEIC photos to the app.
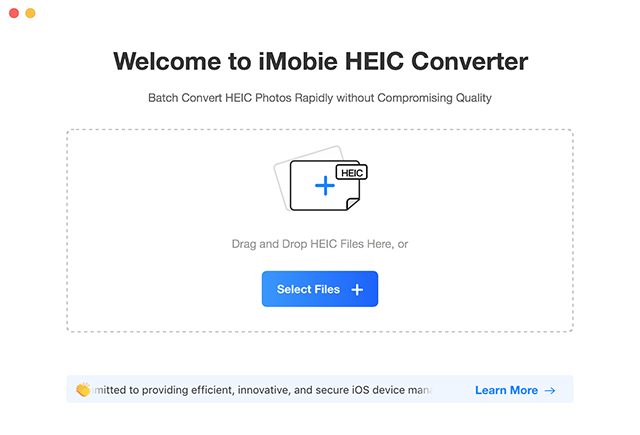
Add HEIC Photos to the App
Step 3. The following screen will let you select the output format and image quality. Click on the Format menu and select JPG, choose the quality for your image, select the destination folder, and hit Convert.
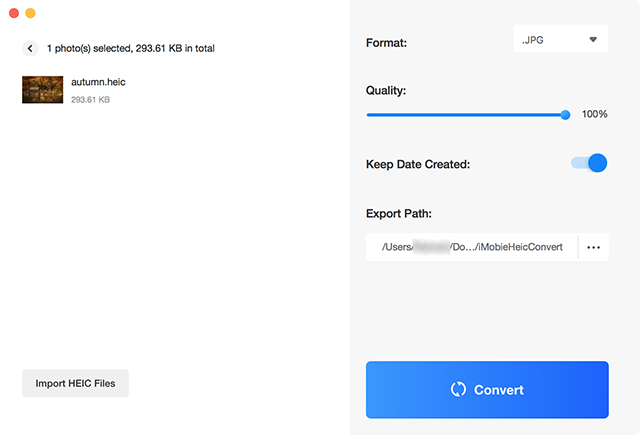
Convert HEIC to JPG with the App
You will find the converted JPG photos in your specified folder.
The Bottom Line
Your iPhone lets you disable the HEIC format if you do not want to use it and we hope our guide above teaches you how to disable this feature on your phone. The guide also tells you what to do with your existing HEIC photos on your devices with iMobie Free HEIC Converter.

Member of iMobie team as well as an Apple fan, love to help more users solve various types of iOS & Android related issues.

iMobie HEIC Converter
FREE & Simple Tool to Convert Any HEIC File to JPG in 3-Step:
- * 100% Free & Safe
Hot & Trending
 HEIC Photos Won’t Upload on My Windows – Here Are the Fixes
 How to Fix Can’t Import HEIC Photos to Mac with the Most Practical Method
 How to Convert HEIC to JPG on Google Drive Easily
 How to Download HEIC Photos as JPG in Google Photos
 How to Open HEIC Files in Photoshop
 How to Open and View HEIC File on Android
 The Best 5 Free HEIC Viewer for Windows and Mac