How to Open a HEIC File on Mac
HEIC files are not new to Apple users and if you don’t already know how to view them, the following guide should teach you how to open HEIC files on Mac. Read on to find out all the available methods of viewing HEIC files on a Mac.
One of the biggest improvements that Apple has brought about for its products is the new image file format called HEIC. Starting with iOS 11, your Apple devices will capture and save photos in this new format instead of the decades-old JPG format. The reason the company chose HEIC as the default image format is that it uses much lesser space than the JPG format when storing your image files.
Don’t Miss: What’s the Difference between HEIC vs JPG >
While the iOS devices are already capable of accessing this new file format, Mac users might have trouble viewing these files. If you are a Mac user and are unable to open HEIC files, the following guide will help you out. It teaches how to open HEIC on a Mac using various ways.
Let’s get onto it without further ado:
How to Open a HEIC File on Mac with 3 Photo Apps
Currently, HEIC photos only been provided running on macOS High Sierra v10.13 or later. Thus you can directly move to Part 2 if your macOS is not supported.
There are multiple ways to open HEIC files on a Mac and we are going to explore all of those in the sections below. You may choose to use any method that you think works the best for you.
The first two methods given below require you to be on macOS High Sierra or later. If you have not yet updated your macOS yet, do so now from the Apple menu > About This Mac > Software Update.
Method 1. Open HEIC on Mac Using the Photos App
If you have been using a Mac for quite some time, you have likely used the Photos app on your machine. The app allows you to import your photos and organize them using various ways on your Mac. It is even capable of storing and letting you view HEIC files and the following is how you do it.
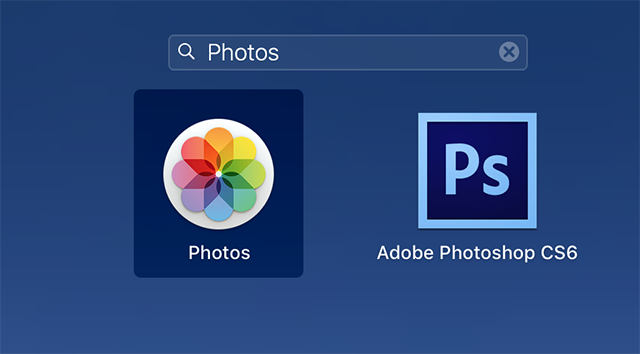
Step 1. Launch the Photos app on your Mac by either clicking on the app icon in your Dock or searching for and clicking on Photos in Launchpad.
Open the Photos app on your Mac
Step 2. When the app launches, click on the File menu at the top and choose the option that says Import. It will let you add new photos to your albums.
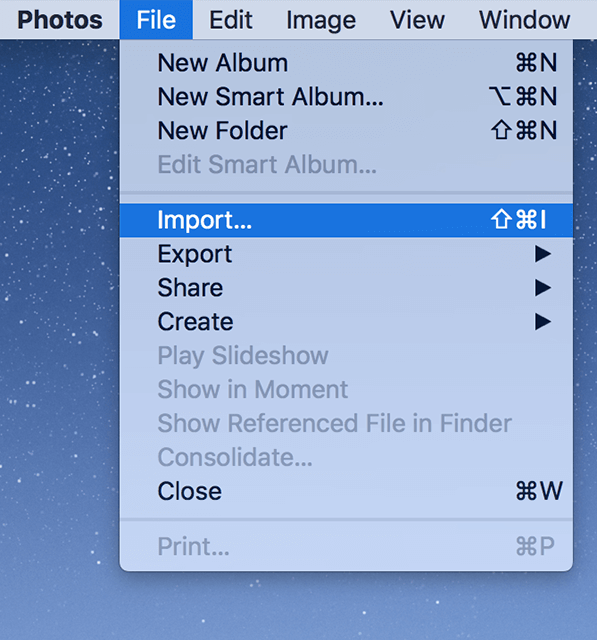
Import HEIC photos in the Photos app on Mac
Step 3. Locate your HEIC files, click on them, and then click on the Review for Import button to add the selected files to the app.
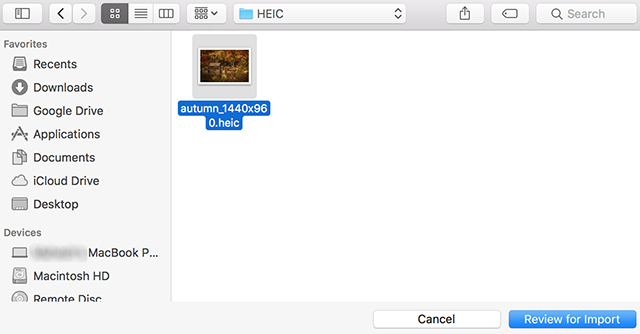
Browse for and select HEIC photos to be imported into the Photos app
The app will import your chosen HEIC files. Once imported, you should be able to view them just like other images.
Method 2. Open HEIC Files on Mac Using the Preview App
Preview is also capable of opening HEIC files on your Mac and you can use it to view or preview your files. It may even be the default viewer for HEIC files on your machine.
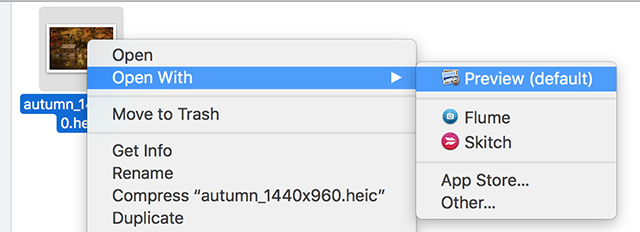
Open HEIC photos using Preview on Mac
To open a HEIC file in Preview, right-click on your HEIC file and select Open With followed by Preview. The file will launch in the Preview app on your Mac.
Method 3. Use Dropbox to Open HEIC Files on Mac
If you do not wish to update your Mac for some reason, you still have a way to open HEIC files on your machine. The method uses Dropbox as the medium to let you view HEIC files and the following is how to do it.
Step 1. Launch the Dropbox app on the device where your HEIC files are saved and upload all the files to your Dropbox account.
Step 2. Install the Dropbox app on your Mac, log-in to your account, and you should be able to view your uploaded HEIC files. That is how you use Dropbox to access HEIC on Mac.
How to Open a HEIC File on Mac with iMobie HEIC Converter
If you do not wish to proceed with the above methods to open HEIC on your Mac for some reason, you can still view the said file type on your machine. All that you need to do is use a web-based app called iMobie HEIC Converter to convert your files to then view them on your machine.
iMobie HEIC Converter converts your files to the widely popular JPG format. It supports drag and drop, has a custom quality meter, and is absolutely free to use. The following is how you use it on your Mac.
Step 1. Launch Safari, Chrome, or any other browser on your Mac and go to the iMobie HEIC Converter website.
Step 2. Once you are on the website, click on the Click to Select button to add your HEIC files. You may also drag and drop your files onto the panel if you wish.
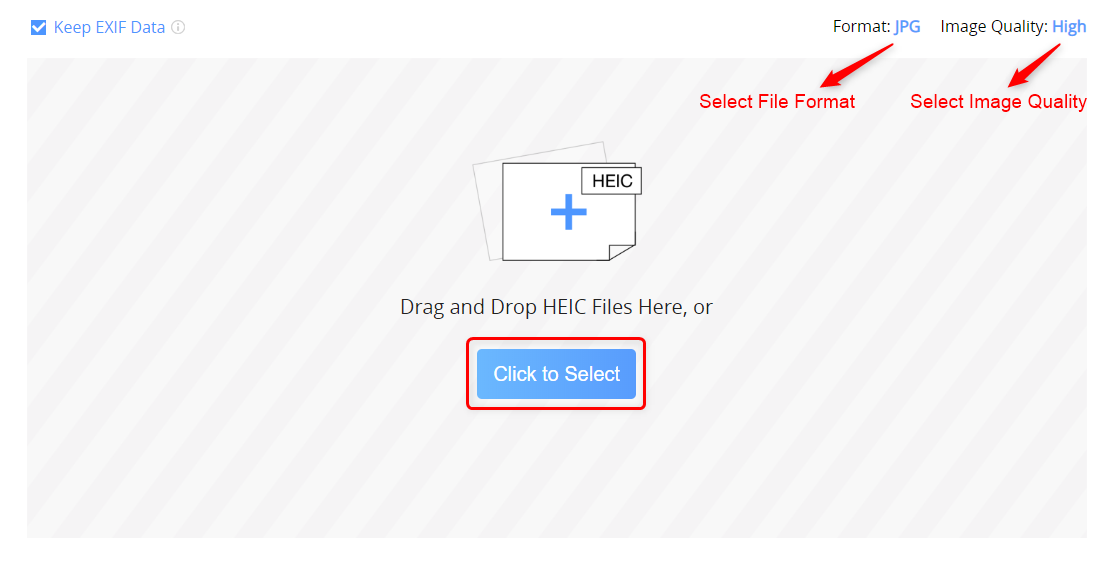
Convert HEIC Photos to JPG Using iMobie HEIC Converter
Step 3. If you don’t want to lose your EXIF data, tick-mark the Keep EXIF Data option. Choose an image quality level from the Image Quality menu.
You should be able to download the converted files when the conversion process is over.
The Bottom Line
Although Macs are developed by the same company that introduced the HEIC format, these machines do not have support for the new image format by default. Our guide above should help you learn how to open HEIC files on your Mac by either adding support for the new file format or providing alternate ways.
More Related Articles

Popular Articles & Tips You May Like


Work for iMobie team for 5 years as well as an Apple fan, love to help more users solve various types of iOS or Android related issues.

iMobie HEIC Converter
FREE & Simple Tool to Convert Any HEIC File to JPG in 3-Step:
- * 100% Free & Safe
Hot & Trending
 How to Convert HEIC Photos on DropBox to JPG
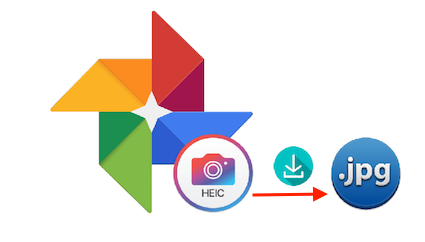
 How to Convert HEIC to JPG on Google Drive Easily
 How to Download HEIC Photos as JPG in Google Photos
 How to Open and View HEIC File on Android
 How to Open a HEIC File in Windows 10/8/7
 How to Change a HEIC File to JPG on iPhone
 How to Convert HEIC to JPG on Windows 10